
Blog
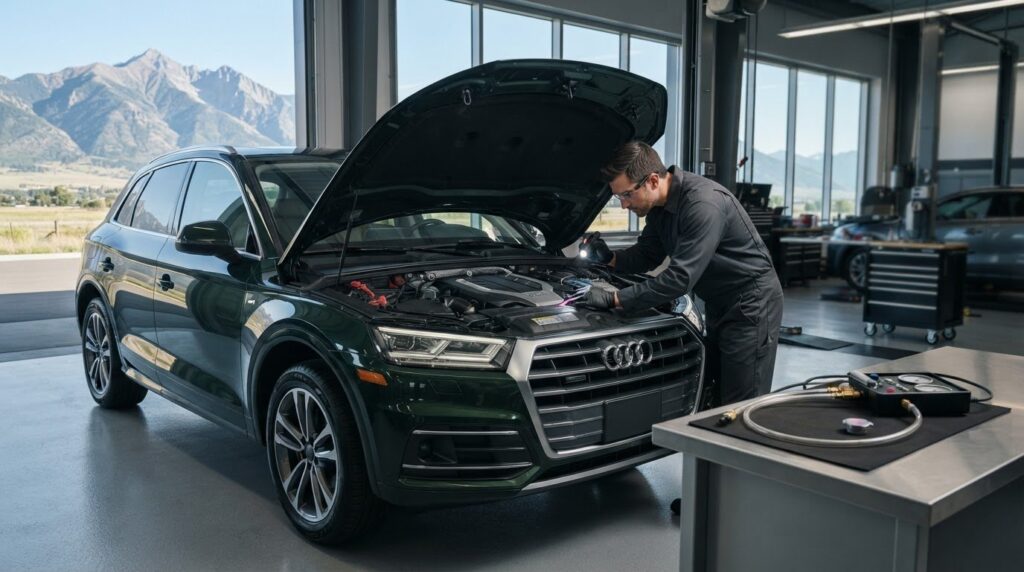
A coolant leak doesn’t automatically mean the whole cooling system needs replacing. For land rover discovery 3 coolant leak diagnosis in Belgrade, the right repair is to replace the component that testing identifies as the source; a faulty coolant filler cap can also contribute to slow coolant loss. Replacing parts without locating the leak can leave the underlying problem unresolved.
It’s understandable to want a clear answer before driving a high-value vehicle with a falling coolant level. This guide explains how to check the level safely when the engine is cold, which signs can help narrow down a leak, and why the cap and overflow outlet deserve attention on a TDV6.
You’ll also learn how diagnosis can distinguish a failing hose, connection, radiator, pump, or other component from coolant escaping under pressure. The goal is an evidence-based repair, not a guessed parts list.
Key Takeaways
- Clean away old coolant residue and trace the highest fresh wet point to help pinpoint the source before replacing parts.
- Check the coolant level only when the engine is cold, then watch for a changing level or new traces of leakage.
- Inspect the cap and overflow outlet alongside common leak points; a cold pressure test may not reveal every fault.
- Look closely at seals, hoses and plastic fittings, since a damaged seal or brittle connection can let coolant escape.
What should be replaced during a cooling-system repair?
Replace the failed part, not every cooling component. A Land Rover Discovery 3 L319 with 2.7 TDV6 has a typical model period of 2004-2009. Age alone doesn’t identify the leak. First, remove old coolant residue from suspected areas. A clean surface makes fresh traces easier to follow. Start near the visible stain, then inspect upward. Coolant can travel along covers and hoses. The highest fresh wet point often narrows the search. Don’t mistake a low drip for its source.
Note where residue appears before cleaning. Wipe accessible surfaces, then inspect them again for fresh wetness, dried colored deposits, or crust around joints. Follow the trail toward its highest point. Check the filler cap and overflow outlet, too. Coolant can escape through the overflow outlet if pressure exceeds what the cap can handle, and a faulty cap can contribute to slow coolant loss. Replace it only when inspection or testing confirms a fault.
A pressure test pressurizes the cooling system to reveal escaping coolant. UV dye circulates through the system, and a UV lamp helps trace its path. A cold pressure test may miss some faults, so a hot inspection or dye test can provide additional evidence.
Use the findings to decide what needs replacement:
- Replace a cap if it fails inspection or testing.
- Replace a hose or fitting if fresh leakage traces to it.
- Replace a pump or radiator only when evidence points there.
- Renew a seal when coolant escapes at its joint.
For specified 2.7 TDV6 applications, LR009324G-1 is listed as an SKF water pump. Part fitment matters, so match any replacement to the vehicle’s application. Choose coolant by the manufacturer’s specification, not its color. If the TDV6 overheats, stop safely and switch off the engine. Continued driving can worsen the problem. A careful trace helps avoid replacing sound parts while the actual leak remains.
Cold coolant-level checks and leak inspection
Check the Discovery 3 only when cold. Park on level ground before inspecting. Find the expansion tank and read its markings. Note the level against the marked range. Don’t judge it immediately after driving. Heat changes coolant volume and can alter readings. A cold check gives a consistent reference point. Record the level and date. That creates a baseline for later comparison.
Inspect the tank, cap, hoses, and visible joints. Look for fresh wetness, dried deposits, or staining. Check beneath the vehicle for new drips. Coolant can travel along nearby parts, so note where residue appears. Wipe accessible surfaces, then inspect again later. Marking the level helps show whether loss continues. Recheck after 2-3 weeks and compare readings. If the level keeps falling, the leak remains active.
Use the manufacturer’s coolant specification, not the fluid’s color. The exact capacity depends on the engine configuration and refill conditions. A system that retains coolant needs less replenishment than one that has been fully drained. Match the fill amount to the vehicle’s service requirements.
Is driving safe with a coolant leak? If the TDV6 overheats, stop safely and switch off the engine. Don’t continue driving while it overheats. Further running can worsen overheating and risk engine damage. A small leak still needs monitoring because coolant loss can increase.
- Check only when the engine is cold.
- Record the level and inspection date.
- Look for deposits around caps and hose joints.
- Track changes after the 2-3-week recheck.
Temperature changes matter alongside level changes. Watch the gauge during normal operation. If it rises abnormally, stop safely. Don’t remove a cap from a hot system. Keep coolant away from children and pets. For persistent loss, a cooling-system inspection can help trace the fault. Consistent notes give the inspection useful context. Include the level, date, visible residue, and temperature behavior. Those details help distinguish a slow seep from a worsening leak.
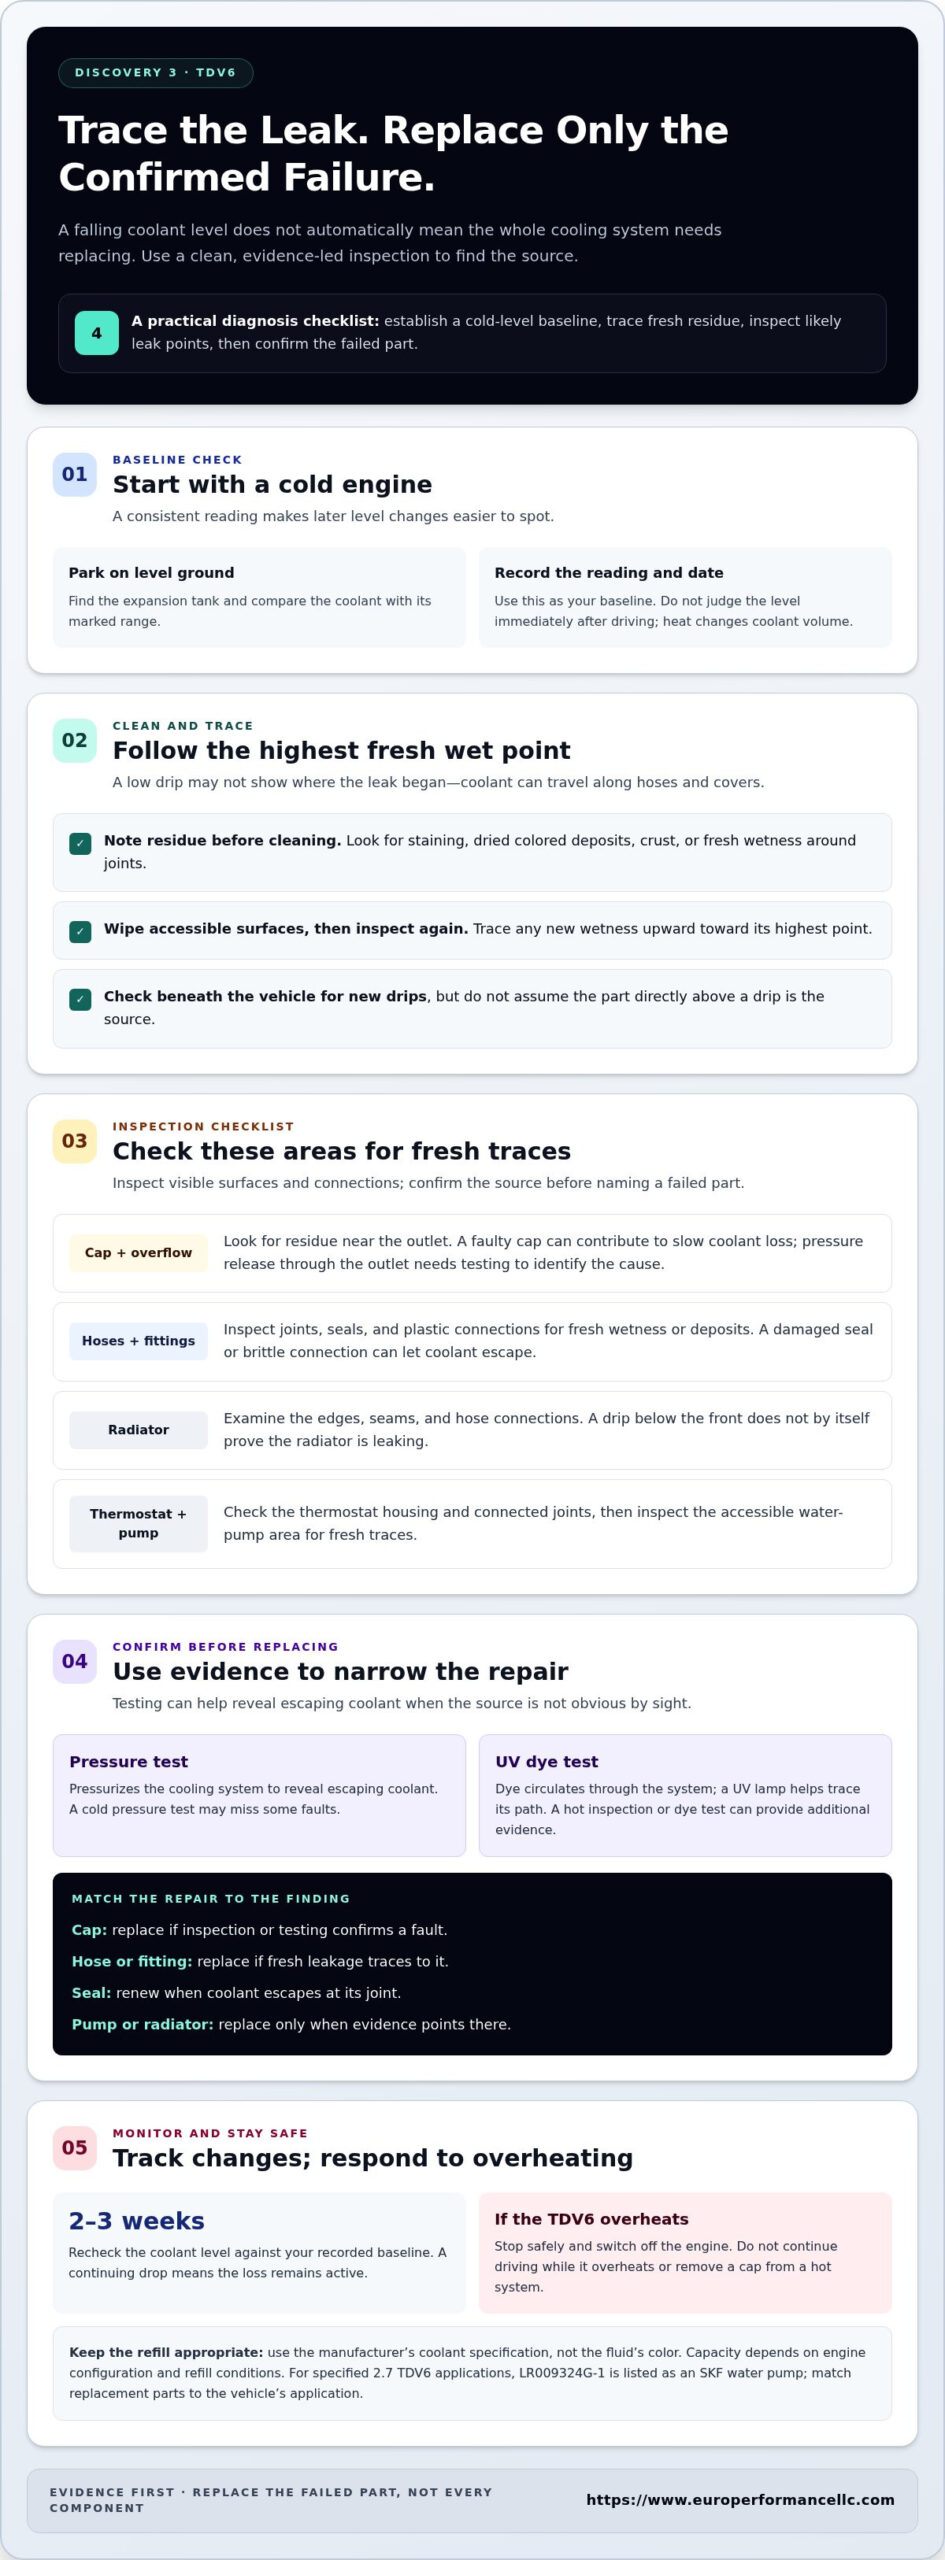
Common TDV6 coolant-leak locations
On a Discovery 3 TDV6, inspect the cap and overflow outlet. A cap that cannot manage pressure may release coolant through the overflow. Residue near that outlet points to pressure release, but testing must identify the cause. Dampness at a hose joint suggests another path. Trace fresh coolant upward. The highest wet point can help distinguish the source from a lower drip. A Land Rover Discovery 3 coolant leak diagnosis in Belgrade should follow that evidence before naming a failed part.
The radiator sits at the front of the cooling system, behind the grille. Inspect its edges, seams, and hose connections for wetness or dried deposits. Coolant pipes and hoses connect the radiator to engine passages, so follow each visible connection. A drip below the front does not prove the radiator itself is leaking. Airflow and surrounding parts can change where coolant lands.
The thermostat sits along the engine’s coolant flow path. Inspect its housing and connected joints for deposits. The water pump circulates coolant through the system. Check its accessible area for fresh traces, then verify the source. LR009324G-1 is listed as an SKF water pump for specified 2.7 TDV6 applications. That identifier alone doesn’t establish fitment for every Discovery 3. During Land Rover Discovery 3 coolant leak diagnosis in Belgrade, match parts to the vehicle’s application.
Repair costs depend on the failed component and the access it requires. A cap or exposed hose connection generally needs less access work than a component behind surrounding parts. The repair scope also depends on the parts required and any related seals or connections.
- Cap and overflow: Check for residue near the outlet.
- Radiator: Examine seams, edges, and hose joints.
- Thermostat housing: Inspect connected joints and surfaces.
- Water pump: Confirm leakage at the pump area.
These locations guide inspection, not automatic replacement. Pressure testing can reveal leaks under system pressure, while a cold test may miss some faults. A hot inspection or UV dye can provide more evidence. Compare fresh wetness with nearby joints and coolant flow paths to distinguish a leaking pump from coolant running down from a higher connection. Replace the confirmed source, not simply the lowest visible part.
Replacing seals and inspecting hoses and plastic fittings
A leaking joint may need a new seal, not a new assembly. Once the source is identified, inspect the sealing surface for cracks, corrosion, grooves, or trapped debris. Damage can prevent a replacement seal from sitting evenly. Clean the joint before fitting the new seal, and match its shape and size to the removed part. Don’t force a seal into a mismatched groove. A twisted or pinched seal can leak again.
Inspect hoses along their full accessible length, including bends, clamps, and connection ends. Look for splits, swelling, abrasion, or hardened sections. A hose may appear sound near its clamp but be cracked farther along. Check the underside for wear marks from rubbing. Replace a hose when damage or leakage points to it, not unrelated hoses simply because one connection is leaking.
Plastic fittings can crack around joints or retainers. Check for hairline splits, distortion, and coolant deposits. A fitting may leak only as the system warms and parts move, so inspect the connected hose, clamp, and sealing face together. Replacing only a seal won’t fix a cracked fitting. Likewise, a sound fitting won’t stop a damaged hose from leaking.
- Seal: Check its seat and mating surfaces.
- Hose: Inspect bends, clamps, and hidden wear.
- Plastic fitting: Look for cracks or distortion.
- Connection: Confirm the hose sits securely.
After reassembly, refill with coolant meeting the vehicle manufacturer’s specification. Check the repaired joint for fresh seepage. A pressure test can help assess whether the connection holds. If the level drops again, trace the source rather than tightening parts blindly. Accurate inspection helps keep sound components in place. For a persistent leak around a seal, hose, or fitting, book a cooling-system inspection to identify the faulty connection and guide the repair.
Euro Performance Auto Shop LLC: Specialized European Auto Repair
Euro Performance Auto Shop LLC provides specialized European auto repair for Discovery owners dealing with unexplained coolant loss. Turn to the shop when cold level checks show a continuing drop, coolant appears around a hose or fitting, or the leak is difficult to trace. ASE certified technicians can assess the symptoms and identify the repair needed, helping distinguish a leaking seal or connection from a larger cooling-system component.
Share when the coolant level changes, where residue appears, and whether the engine temperature rises. These observations give technicians useful diagnostic context. If the vehicle overheats, stop safely and switch off the engine rather than driving further.
Contact Euro Performance Auto Shop LLC to discuss your Discovery’s coolant leak.
Make the next repair decision with clarity
A confirmed diagnosis can support decisions beyond the immediate repair. Keep a record of completed work and findings to help distinguish a new symptom from an issue already addressed. It also gives future maintenance conversations a useful starting point, rather than relying on memory alone.
For Land Rover Discovery 3 coolant leak diagnosis in Belgrade, pair your observations with a technical assessment. Euro Performance Auto Shop LLC offers Specialized European Auto Repair and Factory Scheduled Maintenance for owners planning repairs and ongoing service. Wheel Alignment is also available separately, not as part of cooling-system diagnosis.
When you’re ready to discuss your Discovery’s repair needs, connect with Euro Performance Auto Shop LLC. A clear service record and an informed next step can make vehicle ownership feel more manageable.
Frequently Asked Questions
What are the common causes of coolant leaks in a Land Rover Discovery 3?
Common causes include a weak coolant cap, leaking hoses or joints, damaged seals, cracked plastic fittings, and leaks at the radiator or water pump. The location and condition of fresh residue can help distinguish them. Deposits around a hose connection, for example, point toward that joint, while coolant near the overflow outlet calls for checking the cap and system pressure.
How can I diagnose a coolant leak on a Discovery 3 step by step?
Start with a cold-engine inspection and note visible wetness or deposits. Record the coolant level and any temperature changes, then observe whether the level drops again. If the source remains hidden, a technician can use pressure testing or UV dye to trace it. After the repair, inspect the affected area for fresh leakage and monitor the level.
What symptoms indicate a failing Discovery 3 coolant crossover pipe or valley gasket?
Possible clues include recurring coolant loss, a sweet coolant smell, or deposits around the engine area without an obvious external drip. Wetness near a pipe connection or beneath the engine’s central area can help guide inspection. These signs alone don’t identify the failed component. Trace the leak to its highest fresh point before choosing a repair.
Which Belgrade garages specialize in Land Rover Discovery 3 cooling system repairs?
Euro Performance Auto Shop LLC in Belgrade is a local option for Land Rover owners seeking specialized European auto repair. Land Rover is among the vehicle makes it services, and its ASE certified technicians handle diagnostics and repairs. For a land rover discovery 3 coolant leak diagnosis belgrade concern, share the observed symptoms and any level or temperature changes when discussing the vehicle’s service needs.